Auto Power-On Configuration for Jetson Orin Nano Custom Carrier Board
Issue Overview
The user is evaluating the Jetson Orin Nano for integration into a custom carrier board for a robotics project. They have noticed that the Orin Nano carrier board documentation mentions both a power button MCU and an auto power-on option. The main question is whether the MCU can be removed when using the auto power-on feature, and if so, what considerations need to be made for power sequencing.
Possible Causes
-
Misunderstanding of power management options:
The user may be confused about the different power-on methods available for the Jetson Orin Nano. -
Lack of clear documentation:
The official documentation might not explicitly state whether the MCU is required for auto power-on functionality. -
Design constraints:
The user’s custom carrier board design may have space or component limitations, prompting the question about removing the MCU.
Troubleshooting Steps, Solutions & Fixes
-
Confirm auto power-on capability:
- Review the Jetson Orin Nano Design Guide documentation to verify the auto power-on feature.
- Ensure that your specific model of the Orin Nano supports this feature.
-
Understanding power sequencing:
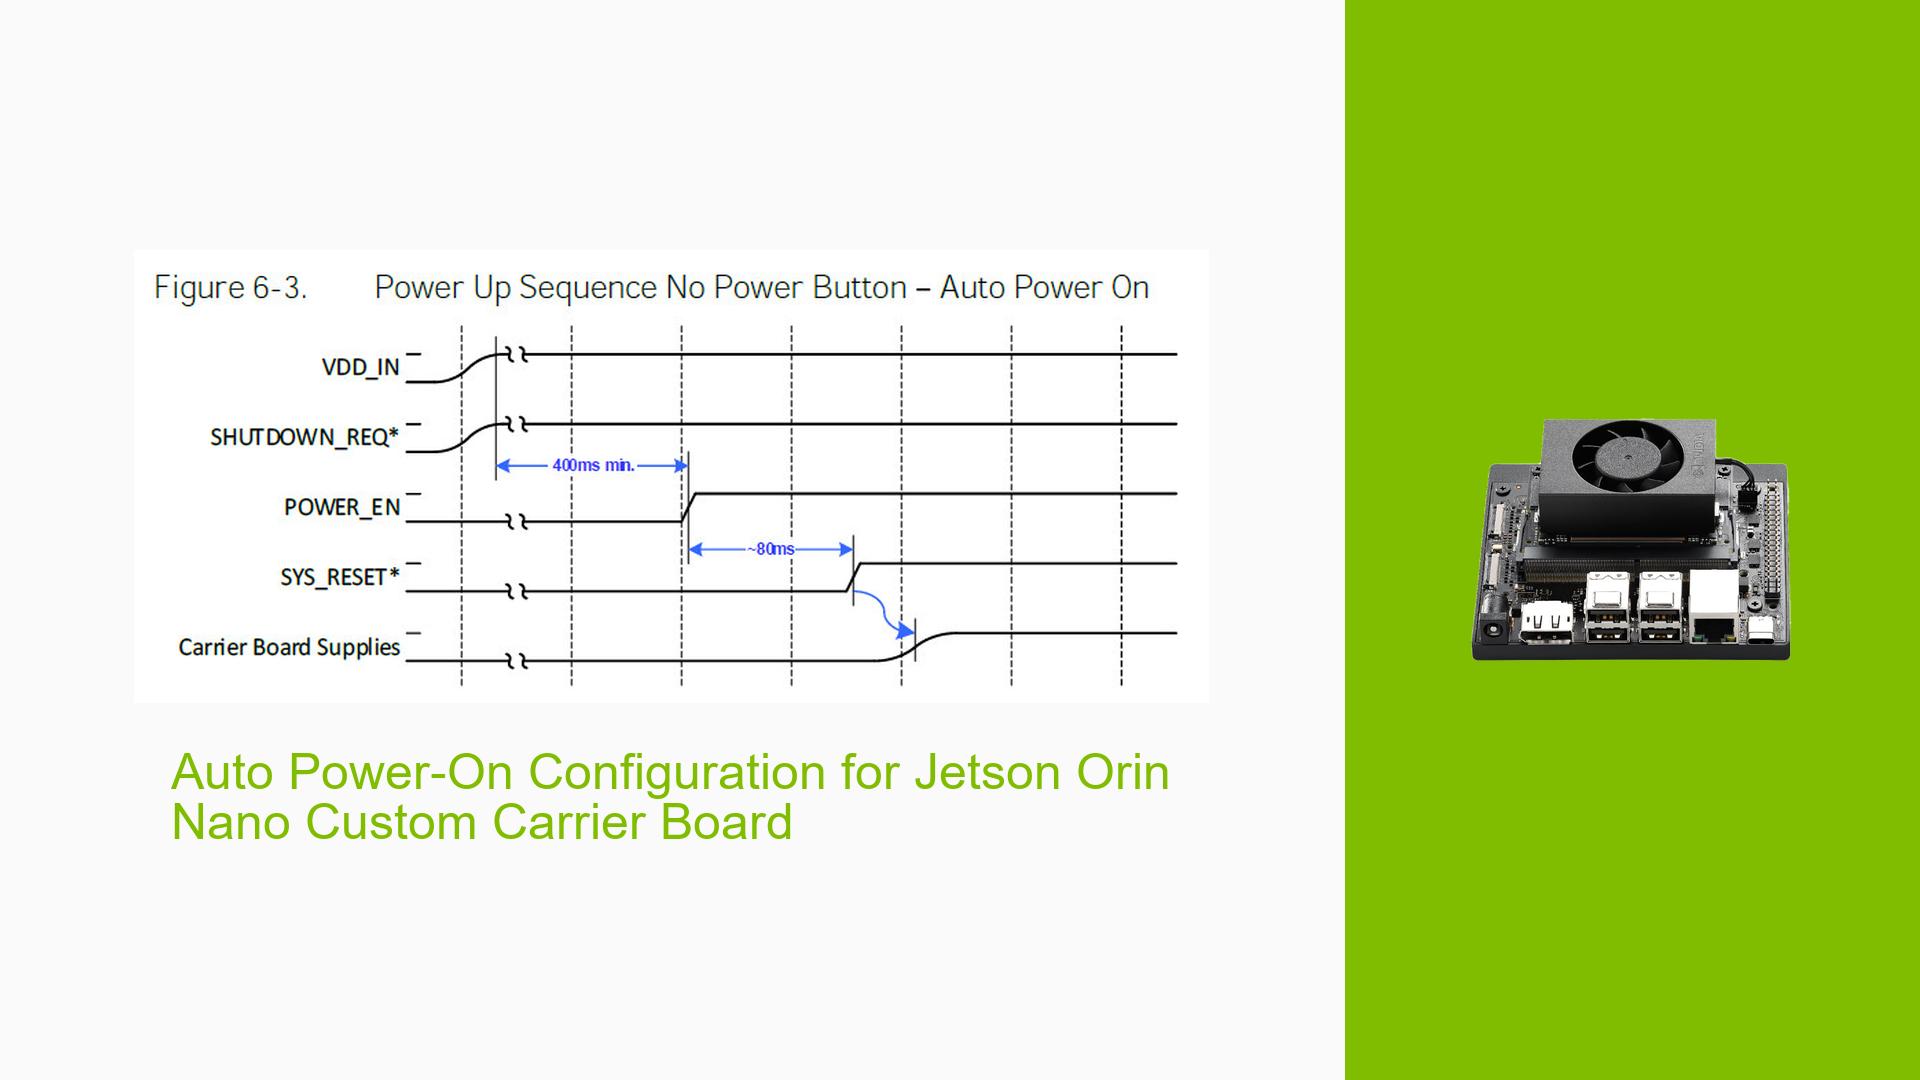
- Refer to the power sequencing diagram provided in the Design Guide documentation.
- The image shows the correct sequence for auto power-on, which includes:
a. VDD_IN ramping up
b. POWER_EN going high after a delay
c. Various voltage rails powering up in a specific order
-
Implementing auto power-on without MCU:
- You can indeed remove the power button MCU when using auto power-on.
- Ensure that the POWER_EN signal is properly managed:
- Connect POWER_EN to a pull-up resistor or a voltage source that will bring it high after VDD_IN is stable.
- Implement a delay circuit if necessary to meet the timing requirements shown in the sequencing diagram.
-
Power sequencing considerations:
- Follow the power-up sequence exactly as shown in the documentation.
- Pay special attention to the timing and order of the various voltage rails.
- Implement any necessary delay circuits or voltage supervisors to ensure proper sequencing.
-
Voltage rail management:
- Ensure all required voltage rails are present and stable before the system fully powers on.
- Use voltage regulators with enable pins that can be sequenced appropriately.
-
Testing and validation:
- After implementing the auto power-on design, thoroughly test the power-up sequence.
- Use an oscilloscope to verify that all voltage rails come up in the correct order and with appropriate timing.
- Test the system under various conditions (cold start, warm start, etc.) to ensure reliable operation.
-
Consult NVIDIA support:
- If you encounter any issues or need further clarification, reach out to NVIDIA’s developer support.
- Provide them with your specific use case and custom carrier board design details for tailored advice.
-
Documentation and best practices:
- Document your custom power-on implementation thoroughly for future reference.
- Consider adding safeguards such as voltage monitoring and reset circuits to protect against power anomalies.
By following these steps and considerations, you should be able to successfully implement an auto power-on feature for your custom Jetson Orin Nano carrier board without the need for a power button MCU.
