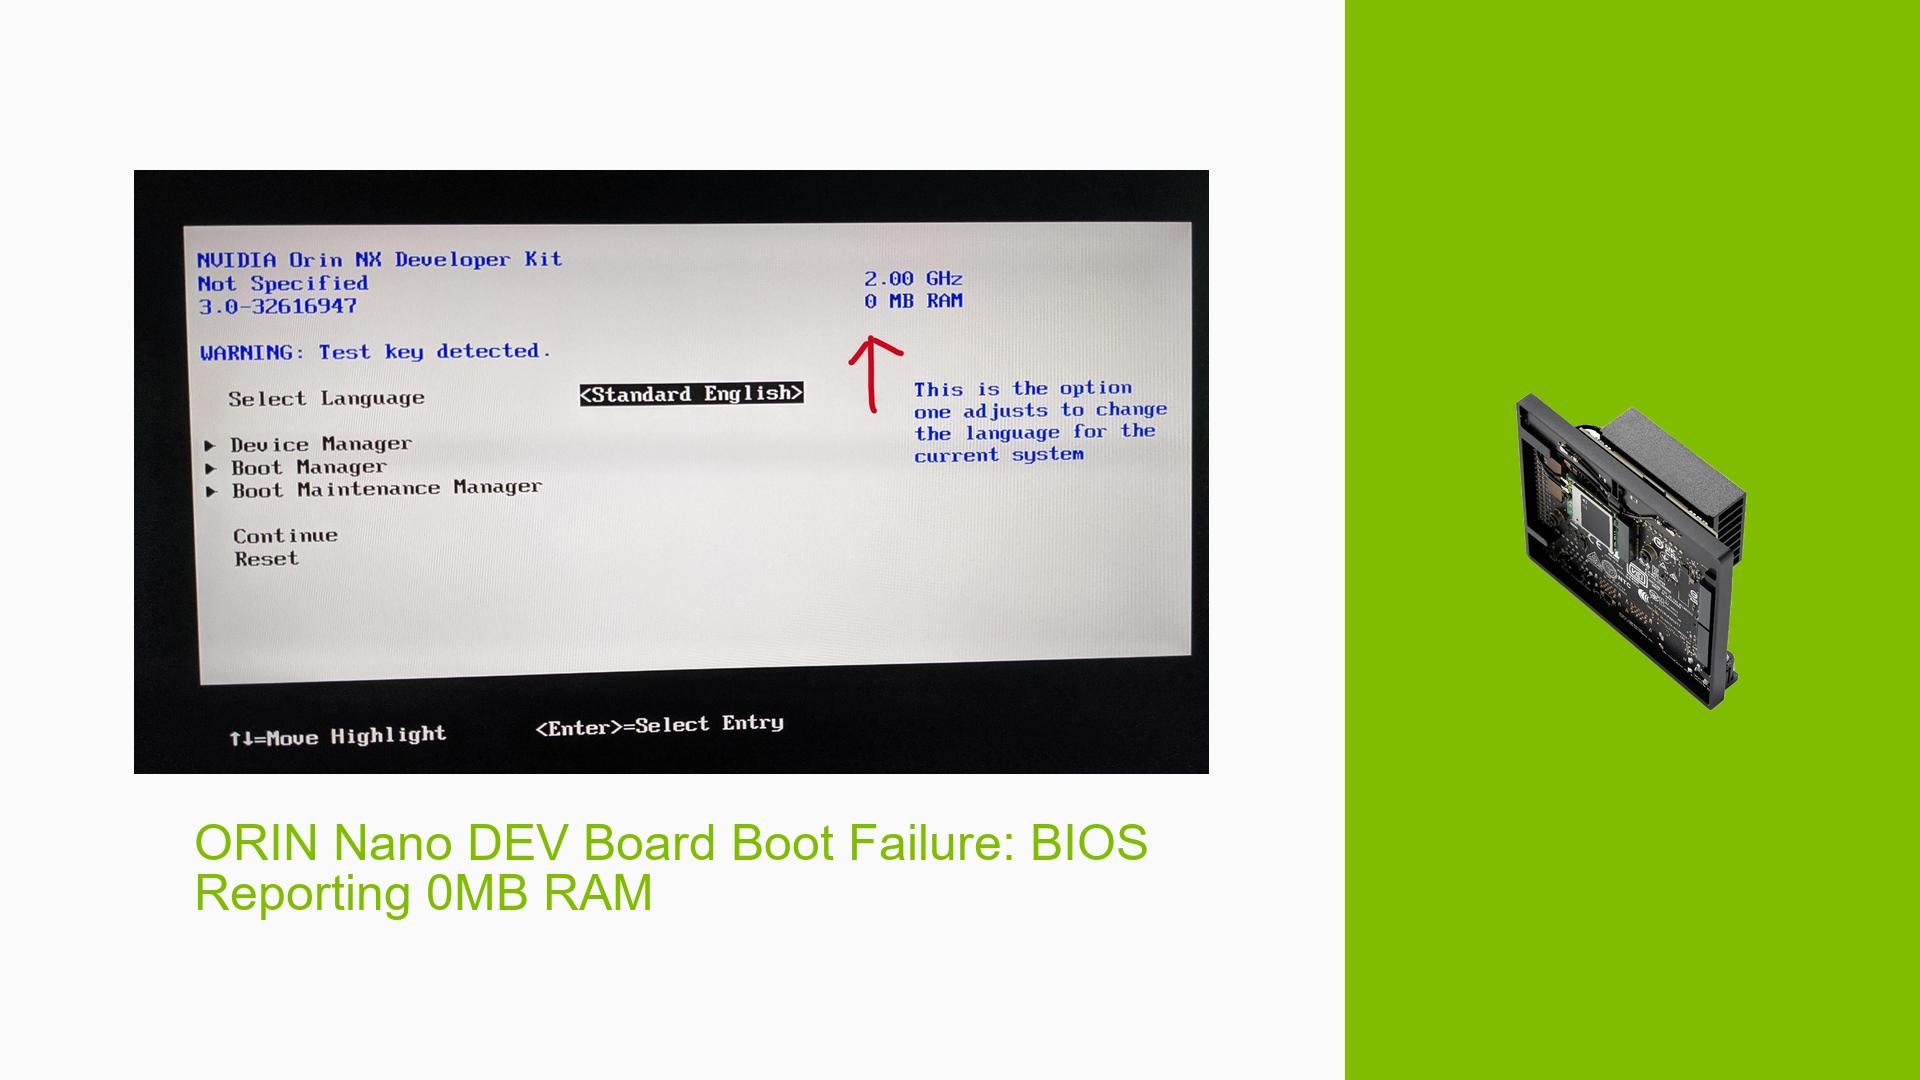
ORIN Nano DEV Board Boot Failure: BIOS Reporting 0MB RAM
Issue Overview
Users of the NVIDIA Jetson Orin Nano Developer Kit are experiencing a critical boot failure where the BIOS setup screen reports 0MB of RAM. This issue occurs after the system locks up during normal operation or software installation. Symptoms include:
- System failing to boot past the BIOS screen
- BIOS setup showing 0MB of RAM
- Screen going dark after the BIOS screen with no further output
- Inability to access the operating system
The problem appears to affect both SD card and NVMe SSD boot configurations, though some users report partial functionality when booting from NVMe.
Possible Causes
-
Corrupted boot media: The sudden power loss during software installation may have corrupted the SD card or boot partition.
-
UEFI firmware bug: The 0MB RAM display could be a visual glitch in the UEFI interface rather than an actual hardware issue.
-
Hardware failure: While less likely, there’s a possibility of physical RAM damage or a connection issue on the board.
-
Incompatible boot configuration: The system may be failing to recognize or properly initialize the RAM due to an incorrect boot setup.
-
Outdated firmware: The board’s firmware may require an update to properly detect and report system memory.
Troubleshooting Steps, Solutions & Fixes
-
Reflash the boot media:
- Remove the existing SD card and mount it on a Linux laptop to check filesystem integrity.
- Create a fresh SD card image using the NVIDIA SDK Manager:
sudo ./sdkmanager - Select the appropriate Jetson Orin Nano Developer Kit and JetPack version.
- Follow the prompts to flash the new image to the SD card.
-
Try booting from NVMe SSD:
- If available, use an NVMe SSD instead of the SD card.
- Flash the NVMe SSD using SDK Manager on a host Ubuntu PC.
- This has resolved the issue for some users, allowing the system to boot into Ubuntu despite the BIOS still showing 0MB RAM.
-
Update firmware and software:
- Ensure you’re using the latest JetPack version compatible with your board.
- Check for any available firmware updates from NVIDIA’s developer website.
-
Verify hardware connections:
- Carefully inspect the board for any visible damage or loose connections.
- If comfortable, try reseating the RAM module (if applicable to your model).
-
Use recovery mode:
- Put the board into recovery mode by connecting the Force Recovery pins.
- Use SDK Manager to reflash the entire system, including firmware.
-
Check system information post-boot:
- If you manage to boot into the OS, verify RAM detection using:
free -h - Use the Jetson Power GUI to check reported system resources.
- If you manage to boot into the OS, verify RAM detection using:
-
Contact NVIDIA Support:
- If all else fails, consider contacting NVIDIA support for potential warranty service or advanced troubleshooting.
-
Monitor temperature and power supply:
- Ensure the board is not overheating and has a stable, sufficient power supply.
-
Test with minimal configuration:
- Remove all unnecessary peripherals and try booting with only essential components connected.
-
BIOS/UEFI reset:
- Look for options to reset BIOS/UEFI settings to default, if available.
Remember, the 0MB RAM display in BIOS might be a visual bug and not indicative of actual hardware failure. If you can boot into the OS and it reports correct RAM, the system may be functioning normally despite the BIOS display issue.
