
Jetson Orin Nano Boot Failure and Overheating Issue
Issue Overview
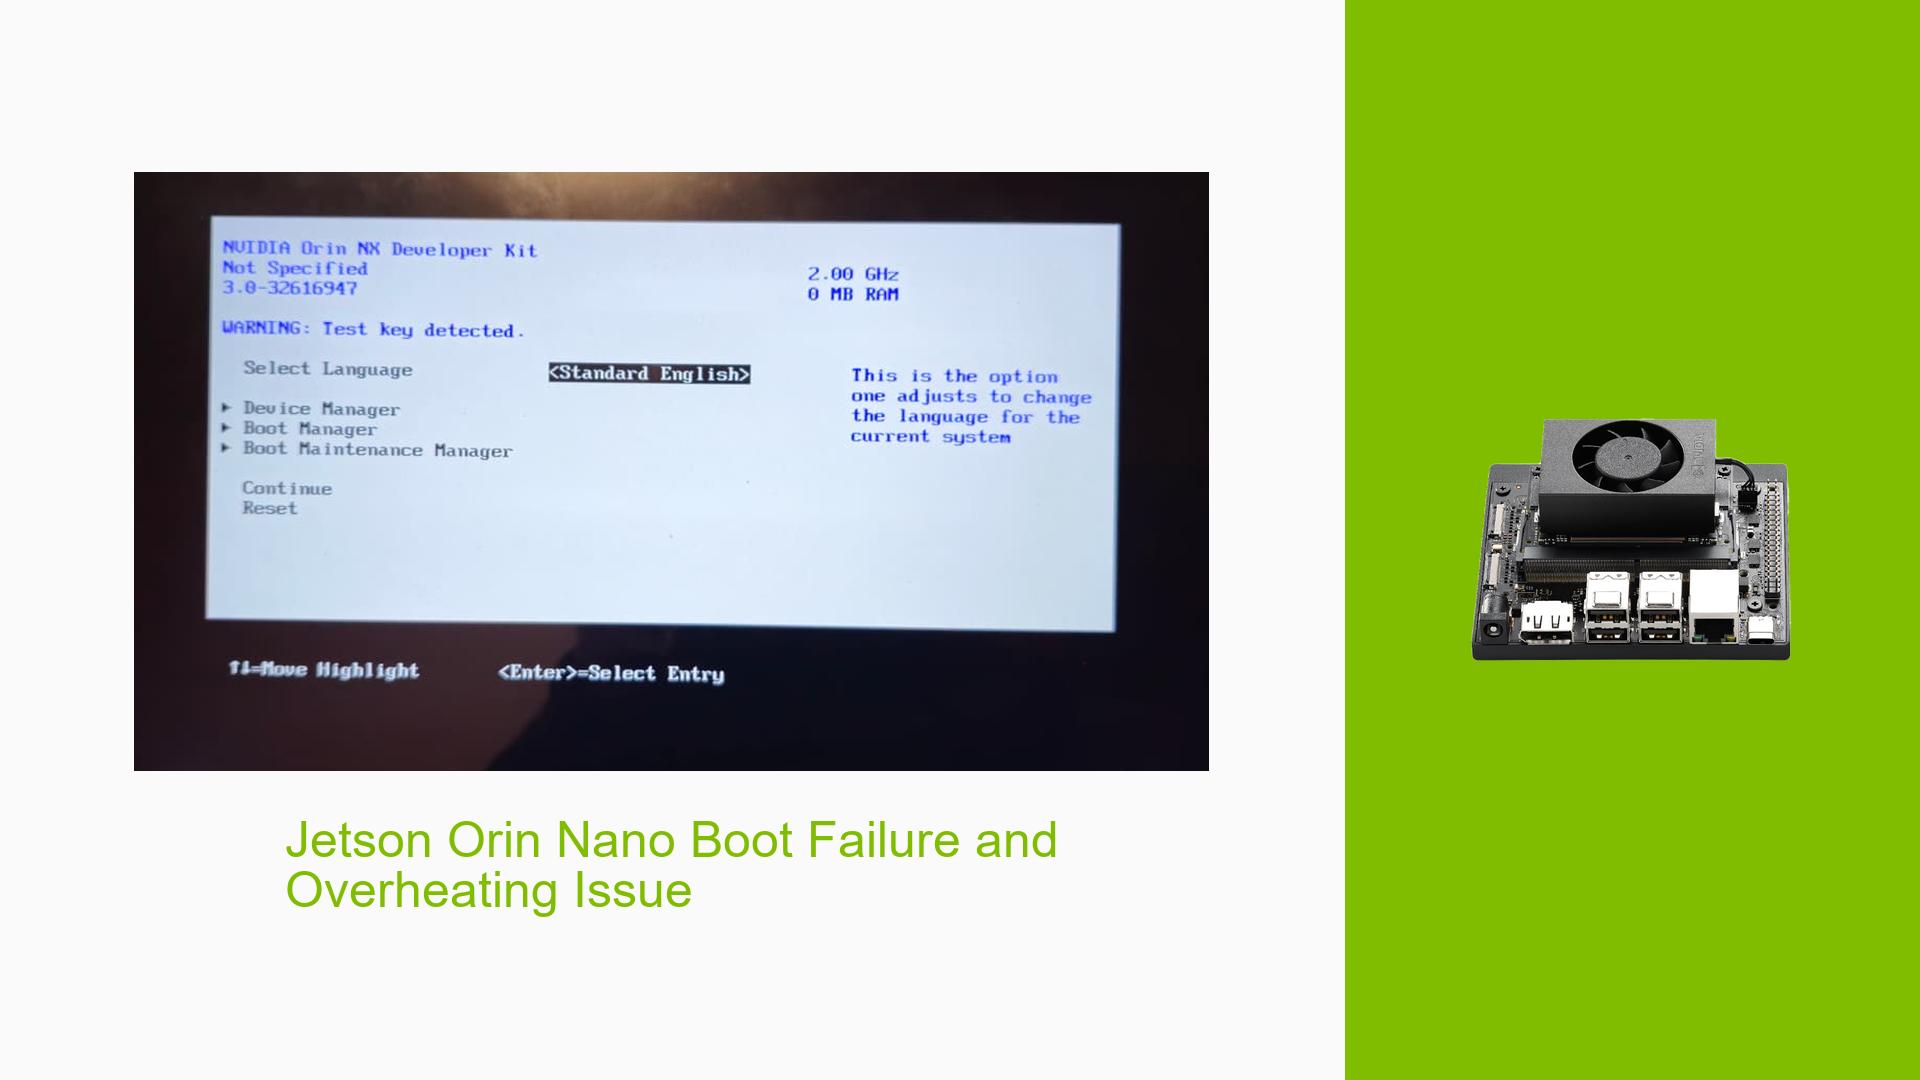
Users of the Nvidia Jetson Orin Nano Developer Kit are experiencing severe boot failures and overheating problems. The issue typically manifests after a few days of normal operation. Symptoms include:
- Failure to boot or display output via HDMI
- No serial console output
- Inability to connect via ethernet or NoMachine
- Device not recognized in force recovery mode
- Fan not turning on, leading to extreme overheating
- Incorrect module and RAM size displayed in EFI
The problem appears to occur suddenly, often after a power loss or disconnection. Users report that the device worked normally for a few days before encountering these issues, even in warm outdoor environments.
Possible Causes
-
Hardware failure: The sudden onset of multiple issues suggests a potential hardware malfunction, possibly triggered by thermal stress or power fluctuations.
-
Corrupted bootloader: Errors in the EFI and inability to boot point to a possible bootloader corruption.
-
Power delivery issues: The reported power source problem on the robot could have damaged the board’s power management system.
-
Thermal management failure: The fan’s failure to activate indicates a problem with the thermal management system, which could lead to further hardware damage.
-
Software corruption: Although less likely given the hardware symptoms, a corrupted OS or critical system files could contribute to the boot failure.
-
Manufacturing defect: Given the short time of operation before failure, a pre-existing defect that manifested after brief use is possible.
Troubleshooting Steps, Solutions & Fixes
-
Attempt to access the serial console:
- Follow the guide at JetsonHacks for setting up a serial debug console.
- Use a USB to TTL adapter, connecting GND, TX, and RX pins correctly.
- Open a terminal program (e.g., PuTTY) with the correct serial settings.
- Power on the Jetson and observe any output.
-
Force Recovery Mode:
- Connect the Type C port to the host PC.
- Short the REC and GND pins on the Jetson.
- Power up the board.
- On the host PC, run
lsusbto check if the device is recognized.
-
Check for physical damage:
- Inspect the board for any visible signs of damage, particularly around power components and the SoC.
- Look for bulging capacitors or burn marks.
-
Thermal paste reapplication:
- If comfortable with disassembly, consider reapplying thermal paste to the SoC.
- Ensure the heatsink is properly seated.
-
Power supply check:
- Test with a known good power supply to rule out power delivery issues.
- Ensure the power supply meets the Jetson’s specifications.
-
Bootloader update attempt:
- If able to access EFI or force recovery mode, try updating the bootloader using the SDK Manager.
- For Ubuntu 22.04 LTS users (which is incompatible with SDK Manager), consider using a virtual machine with a compatible OS to run SDK Manager.
-
QSPI flash update:
- If possible, attempt to reflash the QSPI using the following command in force recovery mode:
sudo ./flash.sh --no-systemimg -c bootloader/t186ref/cfg/flash_t234_qspi.xml jetson-orin-nano-devkit mmcblk0p1
- If possible, attempt to reflash the QSPI using the following command in force recovery mode:
-
Temperature monitoring:
- If the system boots, immediately check temperatures using:
tegrastats - Normal temperatures should be below 80°C under load.
- If the system boots, immediately check temperatures using:
-
Fan control check:
- If booted, try manually controlling the fan:
sudo jetson_clocks --fan
- If booted, try manually controlling the fan:
-
Memory test:
- If able to boot to a shell, run a memory test using memtest86+ to rule out RAM issues.
-
Storage integrity check:
- If able to boot, check the SD card or eMMC integrity using fsck:
sudo fsck -f /dev/mmcblk0p1
- If able to boot, check the SD card or eMMC integrity using fsck:
-
Factory reset:
- As a last resort before RMA, attempt a complete reflash of the system using the latest Jetpack image.
If none of these steps resolve the issue or if you’re unable to perform them due to the severity of the problem, it’s recommended to initiate the RMA (Return Material Authorization) process as suggested in the NVIDIA documentation: What if I need an RMA (Return Material Authorization)?
Note: Given the severity and multi-faceted nature of the reported issues, along with the device’s young age, this problem likely requires professional diagnosis and potentially a replacement under warranty.